Glacier Travel Basics: How to Rope Up, Dry vs Wet Glaciers, Crevasse Safety and Skiing on Glaciers
By Blake Penson · September 26, 2020
Category: training-and-skills
8 min read
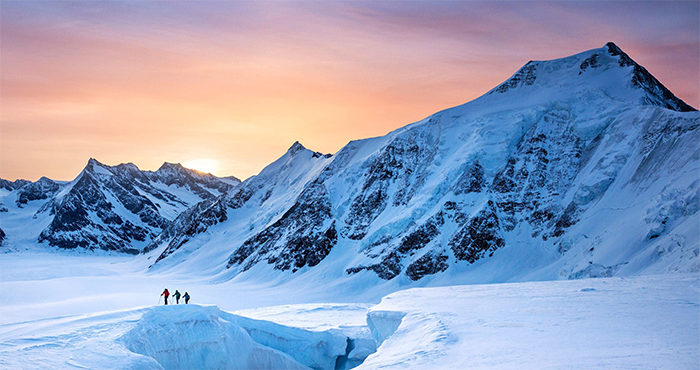
Glacier travel means moving safely across glaciers, where the main hazard is falling into a crevasse. On a "dry" glacier, where the ice is bare and crevasses are visible, you can often walk unroped with crampons if you know what you are doing. On a "wet" (snow-covered) glacier, hidden crevasses may lie under snow bridges, so you should always travel roped together in a team of at least two, ideally three or more, with the rope kept taut, spaced about 8 to 15 m apart, and with everyone trained in crevasse rescue. Travel early in the day when snow bridges are frozen and strongest, probe suspicious areas, and never travel alone on a snow-covered glacier. Skis and snowshoes spread your weight and reduce the chance of breaking through a snow bridge. The best way to learn is a glacier travel and crevasse rescue course with a qualified guide.
| Topic | Key point |
|---|---|
| Main hazard | Crevasses, especially hidden ones under snow |
| Dry glacier | Bare ice; crevasses visible; crampons essential |
| Wet glacier | Snow-covered; hidden crevasses; always rope up |
| Rope team | Ideally 3+ people; rope taut; spacing about 8–15 m |
| Best time | Early morning, when snow bridges are frozen |
| Essential gear | Harness, rope, crampons, ice axe, helmet, prusiks or ascenders, pulleys, ice screws, slings, locking carabiners |
| Key skill | Crevasse rescue (self-rescue and team rescue) |
What is a glacier?
A glacier is a large body of ice that forms from snow accumulating and compacting over many years, and that moves slowly downhill under its own weight. Most of the world's glacier ice is in the great ice sheets of Antarctica and Greenland, but mountain glaciers are found on every continent except Australia. In the tropics, glaciers are found only at very high altitudes, for example on Kilimanjaro and the Andes. At higher latitudes, they reach much lower.
As glaciers flow over uneven ground and around bends, the ice stretches and cracks, forming crevasses. Where crevasses intersect, towers of ice called seracs can form. Seracs can collapse without warning. Where a glacier pulls away from the mountain at its top, a large crevasse called a bergschrund forms.
Glacier hazards
| Hazard | What it is | How to manage it |
|---|---|---|
| Crevasses | Cracks in the ice, up to tens of metres deep | Rope up, probe, avoid weak snow bridges |
| Snow bridges | Snow spanning a crevasse; can collapse | Cross early when frozen, one at a time, at right angles |
| Seracs | Towers of ice that can collapse | Minimise time beneath them; move quickly |
| Icefalls | Steep, broken sections of glacier | Choose routes carefully; avoid in heat |
| Moulins | Vertical shafts where meltwater drains | Stay well away |
| Rockfall | From moraines and walls beside glaciers | Avoid heat of the day; wear a helmet |
| Weather and whiteout | Poor visibility makes navigation hard | Use GPS, map and compass; mark routes with wands |
Dry vs wet glaciers
Dry glaciers
A dry glacier has no snow cover, so you walk directly on ice. Crevasses are visible, and with crampons and an ice axe, experienced climbers can often travel unroped on low-angle dry glaciers. Dry glaciers are common in late summer, especially at lower altitudes.
Wet glaciers
A wet glacier is covered in snow. The snow can hide crevasses completely, and snow bridges may look solid but be thin and weak. Wet glaciers are common in winter, spring and at higher altitudes all year. Always rope up on a wet glacier.
Note: some textbooks use "dry" and "wet" in different ways, but for climbers the key question is simple: can you see the crevasses? If not, rope up.
How to rope up for glacier travel
Team size
- Three or more people is best. If one person falls into a crevasse, two can hold the fall and set up a rescue.
- Two people is possible, but rescue is much harder and requires excellent skills. Two-person teams usually tie in with a longer distance between them and carry extra rope for rescue.
- Never alone on a snow-covered glacier.
Spacing
Climbers on a glacier rope are usually spaced about 8 to 15 m apart, depending on the size of the team and the size of crevasses. The aim is that no two climbers are over the same crevasse at the same time.
Knots in the rope
Some teams tie knots in the rope between climbers. In a fall, the knots cut into the snow lip and help stop the fall. This is common in the Alps, but knots make rescue harder, so guides decide based on conditions.
Keeping the rope taut
Keep the rope just off the snow, without slack. Slack means a falling climber falls further and shock-loads the team. Everyone must walk at the same pace, and the leader should communicate when stopping or changing direction.
Crossing crevasses
Cross crevasses at right angles, one person at a time, with the team holding the rope tight. If you must cross a snow bridge, probe it first with your ice axe or a pole.
Glacier travel gear
| Item | Purpose |
|---|---|
| Harness | Attaching to the rope |
| Dynamic or half rope | Glacier rope (often 30–60 m depending on team) |
| Crampons and ice axe | Movement on ice and self-arrest |
| Helmet | Protection from falls and ice or rockfall |
| Prusik loops or mechanical ascenders | Climbing out of a crevasse |
| Pulleys | Hauling systems for rescue |
| Ice screws and snow anchors (pickets) | Building anchors in a rescue |
| Slings and locking carabiners | Anchors and rescue systems |
| Probe or ski poles | Testing snow bridges |
| Wands | Marking routes in poor visibility |
Skiing and snowshoeing on glaciers
Skis and snowshoes spread your weight across a larger area, which makes it less likely you will break through a snow bridge. Skis can also span narrow crevasses. That is why many glacier tours in spring use skis.
However, skiers can still fall into crevasses, and roping up while skiing downhill is awkward. Ski tourers on glaciers often:
- Follow known routes and tracks carefully, with a guide who knows the glacier.
- Rope up on the uphill when crevasses are suspected.
- Ski one at a time in suspect areas, keeping spacing.
- Carry crevasse rescue gear and know how to use it.
Classic glacier ski tours include the Haute Route from Chamonix to Zermatt.
Crevasse rescue basics
If a teammate falls into a crevasse:
- Arrest the fall. Drop into the self-arrest position and dig in your ice axe and feet.
- Build an anchor. Use snow pickets, ice screws or a buried axe.
- Transfer the load from your harness to the anchor.
- Communicate with the fallen climber. Check if they are injured.
- Decide on rescue: The climber may climb out using prusiks or ascenders, or the team may haul them using a pulley system such as a Z-pulley.
- Protect the lip. The rope cuts into the snow edge, so pad it with an axe or pack.
Crevasse rescue is complex and must be practised many times before you need it. A course with a qualified guide is essential.
Top tips for glacier travel
- Start early. Snow bridges are strongest when frozen in the early morning.
- Probe suspicious areas, especially sags or changes in snow colour or texture.
- Watch for crevasse signs: sagging lines, slight depressions and cracks in the snow.
- Stay alert. Always be ready to arrest a fall.
- Wear sun protection. Glaciers reflect intense UV. See our guide to sun protection in the mountains.
- Stay hydrated and fuelled. Glacier days are long.
- Follow your guide. Guides know the glacier and how it changes.
Glacier travel on big mountains
Many of the world's most popular climbing objectives involve glacier travel. On Mont Blanc, every route crosses glaciers. On Island Peak and Mera Peak in Nepal, climbers rope up on the summit glaciers. On Denali, teams haul sleds across heavily crevassed glaciers for weeks. On Everest, the Khumbu Icefall is crossed with fixed ropes and ladders over crevasses. Learning basic glacier skills is one of the first steps towards any of these objectives.
On big expeditions, glacier travel also involves skills like moving with a heavy pack, roping up while hauling a sled, camping safely on a glacier and probing campsites for hidden crevasses. On many guided expeditions, the guide or Sherpa team fixes lines and manages the glacier, but you still need to know how to clip in, move efficiently and respond if someone falls.
Climate change and glaciers
Glaciers in the Alps and many other ranges have shrunk dramatically in recent decades. For climbers, this means more exposed ice, larger crevasses, unstable moraines and more rockfall from slopes once held together by ice and permafrost. Routes that were once straightforward snow plods can become complex in late summer. Approaches to many huts have changed, sometimes requiring new ladders or paths. Always check recent conditions and ask local guides or hut wardens about the current state of the glacier.
Common glacier travel mistakes
- Unroping too early because the glacier "looks safe".
- Slack rope between team members.
- Walking in line along a crevasse, so that several people are over the same crack.
- Travelling in the afternoon when snow bridges are soft.
- Carrying rescue gear without knowing how to use it.
- Ignoring signs such as sagging snow or visible cracks.
Where to learn glacier travel
| Location | Why go | Level |
|---|---|---|
| Mount Baker, USA | Heavily glaciated volcano; popular for multi-day glacier and crevasse rescue courses | Beginner to intermediate |
| Mount Rainier, USA | Large glaciers and classic training climbs | Intermediate |
| Chamonix and the Alps | Huge range of glaciers and guided courses | All levels |
| Jostedalsbreen, Norway | One of mainland Europe's largest glaciers; guided glacier walks | Beginner |
| Cayambe, Ecuador | Crevassed glaciated volcano near 5,800 m; good for advanced practice | Intermediate to advanced |
ExpedReview's Mount Baker, Rainier, Chamonix and Cayambe pages list operators by verified climber reviews.
Reading a glacier
Learning to read a glacier helps you find the safest line. Crevasses form where the ice is under tension: where the glacier speeds up, flows over a steepening in the bedrock, turns a corner or spreads out. They often run across the glacier on steeper sections and diagonally near its edges.
Useful features to recognise:
- Sagging lines or dips in the snow may show a hidden crevasse.
- Changes in snow colour or texture can indicate a thinner snow bridge.
- The bergschrund is the crevasse at the top of a glacier, where it pulls away from steeper ice or rock. It is often one of the hardest obstacles to cross.
- Seracs are blocks or towers of ice that can collapse at any time of day. Avoid lingering beneath them.
- Icefalls are steep, broken sections where the glacier flows over a drop, full of crevasses and seracs.
Navigating in bad visibility
Glaciers can become featureless in cloud or a whiteout, making it easy to wander into crevasses. On big mountains, teams mark routes with wands (thin poles with flags) at regular intervals so they can find their way back. A GPS track recorded on the way up, a map and compass, and an altimeter are valuable backups. If visibility drops and you are unsure of the route, it is often safest to stop and wait rather than guess.
Probing for crevasses
When you suspect a crevasse, the leader can probe the snow ahead with an ice axe shaft or an avalanche probe. If the probe suddenly sinks with little resistance, there may be a void beneath. Probing is slow and not foolproof, so it complements rather than replaces good rope technique.
Frequently asked questions
What is glacier travel?
Moving safely across glaciers, typically roped together in teams, using crampons and ice axes and carrying crevasse rescue gear.
What is a dry glacier?
A glacier with no snow cover, where crevasses are visible. Experienced climbers can often cross low-angle dry glaciers unroped.
How do you rope up for glacier travel?
Tie into the rope with a figure-of-eight knot, space climbers about 8–15 m apart, keep the rope taut and move at the same pace.
How do you ski on glaciers safely?
Follow known routes with a guide, rope up when crevasses are suspected, keep spacing, and carry crevasse rescue gear.
Can you travel solo on a glacier?
It is very dangerous on a snow-covered glacier, because no one can arrest a fall or rescue you from a crevasse.
What gear do you need for glacier travel?
Harness, rope, crampons, ice axe, helmet, prusiks or ascenders, pulleys, snow and ice anchors, slings and carabiners.
What are the safety measures for glacier climbing tours?
Travel with a qualified guide, rope up on snow-covered glaciers, start early, probe snow bridges, and carry and know how to use crevasse rescue gear.
When is the best time of day to cross a glacier?
Early morning, when snow bridges are frozen and strongest.
How far apart should you be on a glacier rope?
Usually about 8 to 15 m, so that no two climbers are over the same crevasse. Teams of two often use more spacing and carry extra rope for rescue.
What is a snow bridge?
A layer of snow spanning a crevasse. It may be strong when frozen in the morning but weak in the afternoon sun. Cross one at a time, at right angles, after probing.
Do you need a guide for glacier travel?
For beginners, yes. A qualified guide can choose a safe route and teach roping up and crevasse rescue.
What is a bergschrund?
It is the crevasse at the top of a glacier, where the moving ice pulls away from steeper ice or rock above. It is often hard to cross.
How do you navigate on a glacier in a whiteout?
Use wands placed on the way up, a GPS track, map, compass and altimeter. If you are unsure of the route, it is often safest to stop and wait for visibility to improve.
What is a serac?
A serac is a block or tower of glacier ice. Seracs can collapse without warning at any time of day, so avoid lingering beneath them.
Tags: glacier-travel, crevasse-rescue, rope-team, mountaineering-skills, mount-baker